Panorama SDK
We are happy to introduce the free version of our Panorama SDK as showcased in the App "DMD Panorama Lite" available on the App Store and Play Store. This free version has a few limitations such as 180 degrees. There is a commercial version available against a flat fee or a profit sharing model. You may contact us for more information.
You can easily make your own Panoramic App
The free Panorama SDK is an easy to use and robust library that comes with a sample code.
It is available on the following platforms:
-
iOS:
Download sample XCode Project
-
Android:
Download sample Android Project
How to use the Panorama SDK
Follow these easy steps to build your own Panoramic App:
For iOS:
- Create an Xcode iOS project.
Preparing the SDK's delegate

-
Create a view controller (we'll call it "PLITShootingVC") that implements the "MonitorDelegate" Protocol.
- To do that you have to do the following:
-
Declare that your view controller is conforming to the “MonitorDelegate” protocol as shown below:
@interface PLITShootingVC : UIViewController
-
In the implementation of the view controller "PLITShootingVC" you have to implement the following list of callbacks:
- (void)preparingToShoot; (1)
- (void)canceledPreparingToShoot; (2)
- (void)takingPhoto;
- (void)photoTaken;
- (void)stitchingCompleted:(NSDictionary*)dict;
- (void)shootingCompleted;
- (void)deviceVerticalityChanged:(NSNumber*)isVertical;
- (void)compassEvent:(NSDictionary*)info;
"takingPhoto": notifies the delegate when the SDK is about to capture a photo. You can use this method to make an effect before a photo is taken.
"photoTaken": notifies the delegate when the SDK finishes capturing a photo. You can use this method to count the number of photos or to display a message informing the user to continue rotating.
"shootingCompleted": notifies the delegate when the SDK finishes taking photos (such as when the user requests to stop capturing or when the maximum number of photos are captured). It's preferable to display a progress indicator until the SDK finishes processing the photos.
"stitchingCompleted": notifies the delegate when the SDK finishes stitching. You can use this method to save the newly created panorama or view it using DMD 3D Viewer.
- To do that you have to do the following:
Now to enable shooting

-
Set the previously created view controller "PLITShootingVC" as the MonitorDelegate’s delegate which is the DMD Engine.
You can use the following methods to interact with the SDK:[Monitor instance].delegate = self;
- (void)restart;
- (void)startShooting;
- (void)stopShooting;
- (void)finishShooting;
- (void)stopSensors;
- (void)genEquiAt:(NSString*)fileName withHeight:(NSUInteger)height andWidth:(NSUInteger)width andMaxWidth:(NSUInteger)maxWidth;
"restart": to restart the shooting process from the beginning. It will ignore previously captured photos and reset the SDK.
"startShooting": to start capturing. This may be used when the user taps on the screen or a "start" button (you have to call "restart" function before calling it).
"stopShooting": Ignores previously captured photos and stops the SDK. This can be used when the application goes to the background or to navigate to another section of your app.
"finishShooting": the SDK will stop capturing and start stitching the photos.
"genEquiAt:withHeight:andWidth:andMaxWidth:": saves the panorama to disk with a given height and optionally a specific or maximum width.
Viewing your panorama using DerManDar 3D Viewer
-
Create another view controller (we'll call it "PLITViewerVC") and define a member variable of type "PanoViewer" - which inherits from "UIView" - and add it as a subview.
To start the viewer animation call:PanoViewer *_panoViewer;
To stop the animation call:[_panoViewer performSelector:@selector(start) onThread:[Monitor instance].engineMgr.thread withObject:nil waitUntilDone:NO];
Since DMD 3D Viewer uses a UIGestureRecognizer internally, the SDK gives you access to it:[_panoViewer performSelector:@selector(stop) onThread:[Monitor instance].engineMgr.thread withObject:nil waitUntilDone:NO];
aGestureRecognizer requireGestureRecognizerToFail:_panoViewer.doubleTapGR];
What you should get by doing these easy steps mentioned above
-
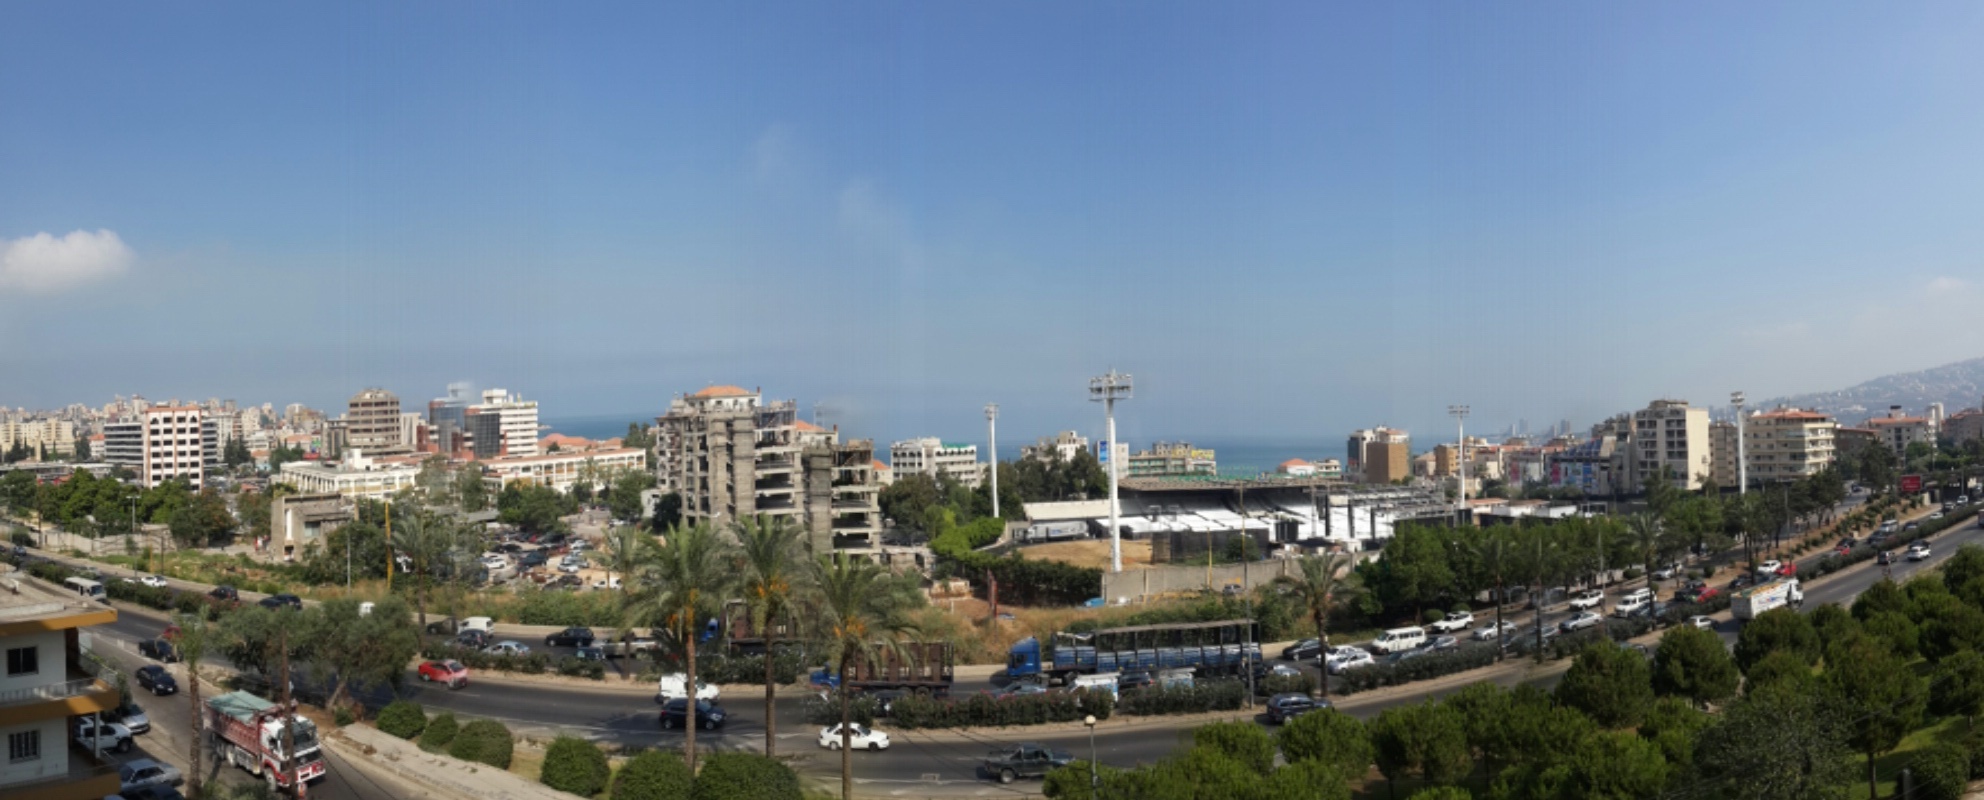
Run the app in portrait mode and you will get the following screen:
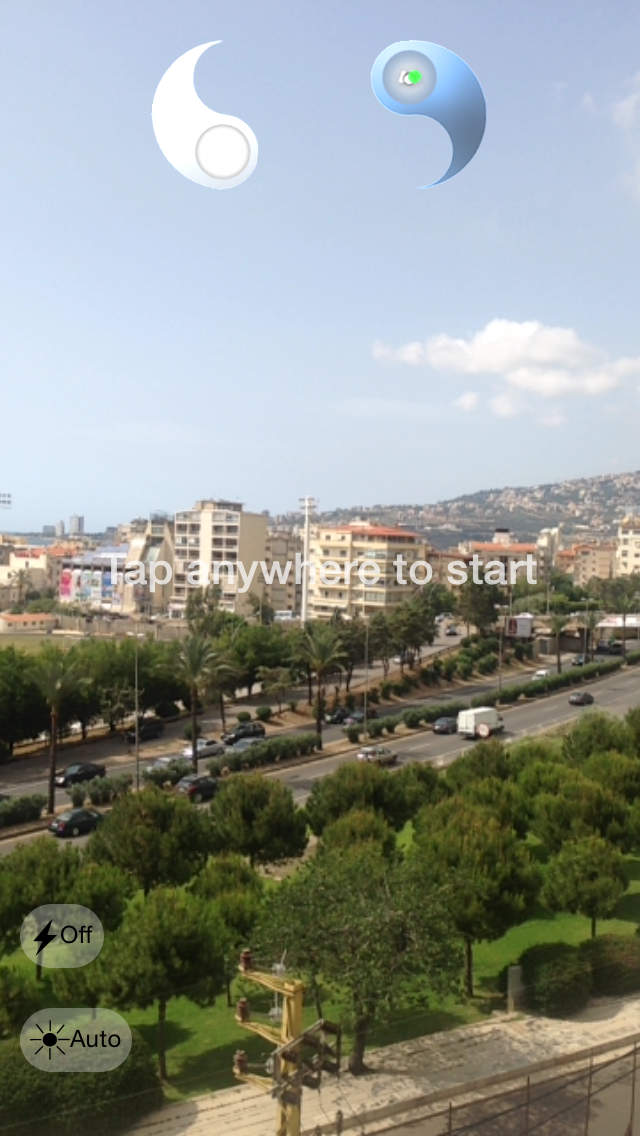
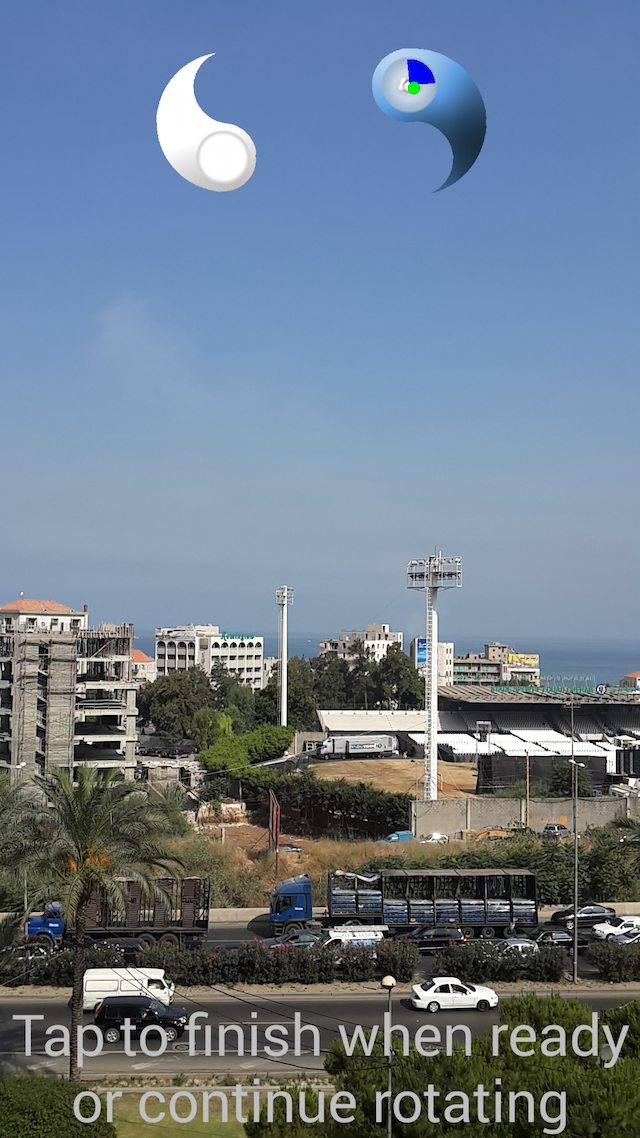
- Tap on the screen then start rotating your device in the same direction (Left or Right).
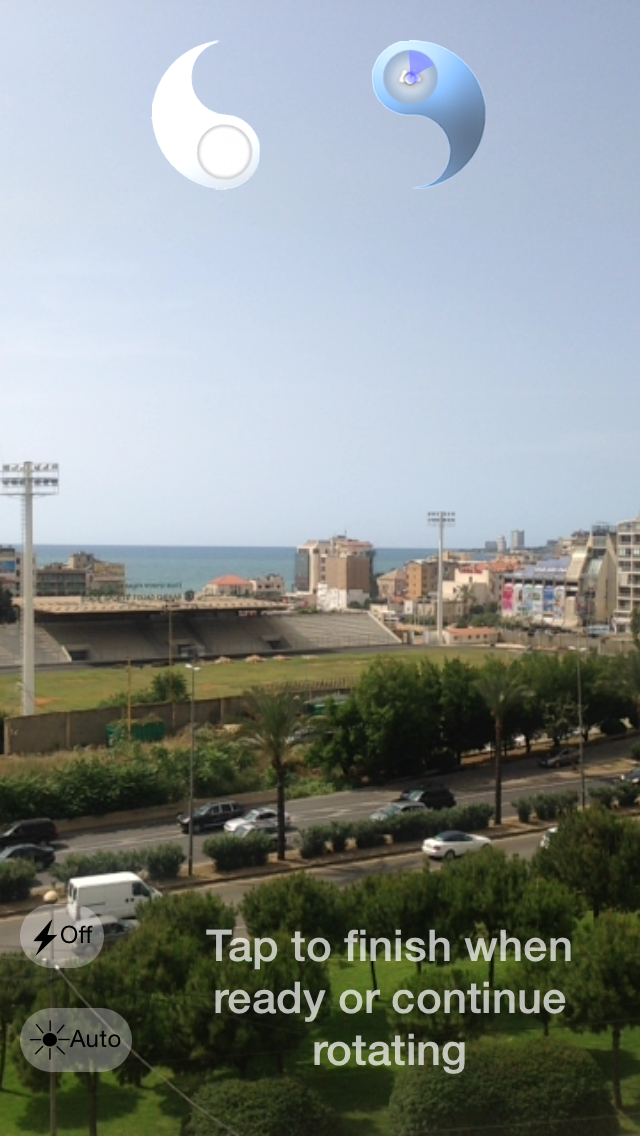
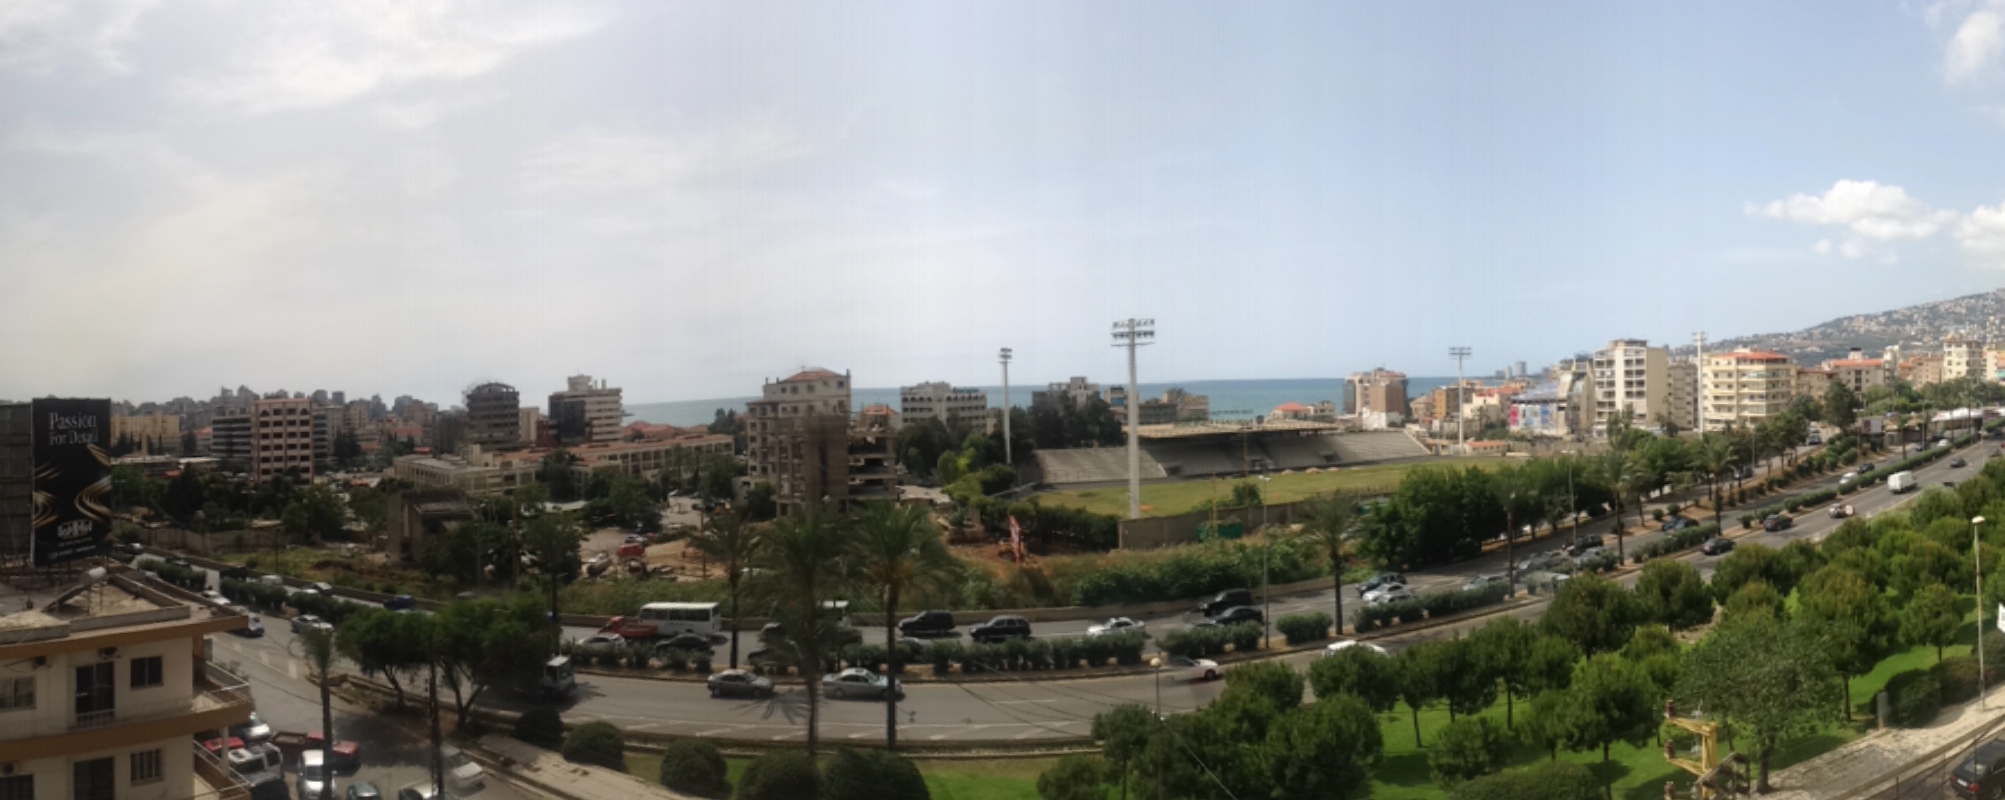
- After taking a minimum of 2 shots, you can tap on the screen or rotate your device to landscape mode to finish. DerManDar 3D Viewer will appear showing the captured panorama.
- Tap on the screen then start rotating your device in the same direction (Left or Right).
DMD Panorama Lite App
-
To try the free application "DMD Panorama Lite", (created with this Panorama SDK) you can get it here.
Commercial Panorama SDK
-
For further information about the Commercial version of this Panorama SDK, please click here.
For Android:
- Create an Android Studio project.
Configuring the project
-
-
Including DMD Library:
Open the project folder and copy: dmd_pano_library_lite.jar from the sample code to <project folder>\app\libs\
The library should now be automatically included in your project. but our library need further resources:
in <project folder>\app\src\main create a directory called "jniLibs" Copy from the sample code the content of "jniLibs" folder to the newly created folder. This folder contain all the dependency required for Dermandar library.
In Android Studio, open Gradle Scripts > build.gradle(Module: app) to load the library with all it's resources properly, add in dependencies the following line:
compile files('libs/dmd_pano_library_lite.jar')
-
Adding UI Resources:
in <project folder>\app\src\main\res\ copy all "drawable" folders and merge the content with any existing folder in our new project. these are the images and icons used in the app.
in <project folder>\app\src\main\res\layout\ copy popup_vertical.xml .
in <project folder>\app\src\main\res\values copy colors.xml those will define colors and a theme for our app.
-
Setting Permissions and Requirements:
We need to declare the permissions needed for our app, and check if some features are available on the device:
in manifests > AndroidManifet.xml add in the manifest block the following lines:
 <uses-permission android:name="android.permission.CAMERA" />
 <uses-permission android:name="android.permission.WRITE_EXTERNAL_STORAGE" />
those will declare that this app needs permission to access the camera and write on the phone storage.
in the same block add:
 <uses-feature
	android:glEsVersion="0x00020000"
	android:required="true" />
 <uses-feature
	android:name="android.hardware.camera"
	android:required="true" />
 <uses-feature
	android:name="android.hardware.sensor.compass"
	android:required="true" />
 <uses-feature
	android:name="android.hardware.touchscreen"
	android:required="true" />
these lines are to specify that we need the device to:
-be compatibility with OpenGL ES 2.0
-have a camera
-have location knowledge via network (to write the locations of each panorama)
-have a compass
-have a touchscreen
in the application block add:
 android:hardwareAccelerated="true"
 android:largeHeap="true"
These lines are to:
-enable the use of hardware acceleration
-allow the app to use a larger heap (to process large images)
finally, in the activity block add:
android:configChanges="orientation"
This line is required for DMD library to perform properly with orientation changes.
-
Including DMD Library:
Preparing the SDK's delegate
-
In Android Studio, open the main activity (I'll refer to it as "ShooterActivity" like in the sample code) located in:
java/com/<user>/<project name>/ShooterActivity .
Here, in the ShooterActivity class we will define several member variables. please note that most variables needs an import, so import the required classes accordingly.
The first important private variable we will need to define is of type DMD_Capture (import com.dermandar.dmd_lib.DMD_Capture). let's call it mDMDCapture.
this object is responsible for taking pictures and stitching them into a panorama.
We will define another private variable to be used as a delegate:this class will allow you to run specific commands at specific times.private CallbackInterfaceShooter mCallbackInterface = new CallbackInterfaceShooter(){}
in the brackets we will need to define all the following functions:
useful functions:
"takingPhoto": notifies the delegate when the SDK is about to capture a photo. You can use this method to make an effect before a photo is taken.
"photoTaken": notifies the delegate when the SDK finishes capturing a photo. You can use this method to count the number of photos or to display a message.
"shootingCompleted": notifies the delegate when the SDK finishes taking photos (such as when the user requests to stop capturing or when the maximum number of photos are captured). It's preferable to display a progress indicator until the SDK finishes processing the photos.
"stitchingCompleted": notifies the delegate when the SDK finishes stitching. You can use this method to save the newly created panorama or preview it using a 3D Viewer.
"deviceVerticalityChanged": notifies the delegate when the SDK detects a change in the phones orientation.
"compassEvent": notifies the delegate when the SDK detects an interference in a compass based devices.
"shotTakenPreviewReady": notifies the delegate when the SDK finished taking a shot and a preview image is ready to be used.
"onFinishGeneratingEqui": notifies the delegate when the SDK finished from generating and saving the wide image to the path provided to "genEquiAt" method.
"preparingToShoot": notifies the delegate when the SDK finds the phone in a suitable position to take the next picture.
"canceledPreparingToShoot": notifies the delegate when the SDK found the phone in a suitable position to take the next picture of the panorama, but the position changed before the picture was taken.
"onCameraStarted": notifies the delegate when the SDK have successfully started the camera.
"onCameraStopped": notifies the delegate when the camera have stopped.
"onFinishRelease": notifies the delegate when the SDK exit the shooter (close the app or exit activity).
functions used in the commercial versions:
"onRotatorConnected": notifies the delegate when the SDK could successfully connected to a compatible rotator.
"onRotatorDisconnected": notifies the delegate when the SDK have disconnected from a rotator.
"onStartedRotating": notifies the delegate when the connected rotator is about to start rotating.
"onFinishedRotating": notifies the delegate when the connected rotator is about to finish rotating.
functions to define, but to keep empty (these are planned for future use):
"shotTakenPreviewReady"
"onGalleryIconClicked"
"onHDRIconClicked_InApp"
"onDirectionUpdated"
"onHDIconClicked_InApp"
"onFinishClear" Now to enable shooting
-
First we will add 2 new private variable (include files accordingly):
mViewGroupCamera will be used by the SDK to show the camera preview, as well as the elements it offers.
private ViewGroup mViewGroupCamera;
private RelativeLayout mRelativeLayoutRoot;
RelativeLayout will be used to display mViewGroupCamera on the screen.
Before using a DMDCapture session make sure you have permission to access the camera and the internal storage, if not ask the user for permission.
To enable shooting, we will need to add in the onCreate function of our shooter activity the following lines:the first command creates a new capture session.mDMDCapture = new DMD_Capture(); mViewGroupCamera = mDMDCapture.initShooter(this, mCallbackInterface, getWindowManager().getDefaultDisplay().getRotation(), true, true); mRelativeLayoutRoot.addView(mViewGroupCamera);
the second command initializes all elements required for a shooting session and return the UI elements to begin capturing a panorama.
the last command will add the UI elements to the relative layout.
mDMDCapture will provide us with the following functions:
- restart()
- startShooting(string temporaryPath)
- stopShooting()
- finishShooting()
- genEquiAt(string fileName, int height, int width, int maxWidth, bool logoZenith, bool logoNadir)
- release()
"restart": will stop the shooting process and start again.
"startShooting": will start the shooting process. the argument is a path where the app can save temporary files
"stopShooting": will cancel the shooting process.
"finishShooting": will stop the shooting process and start stitching.
"genEquiAt": will save the stitched panorama. it's advised to keep width and maxWidth 0 (these give some control on the resolution. keep in mind the aspect ratio is a constraint). logoZenith and logoNadir are unused in the free version so keep them as false.
"release": will release allocated memory.
in the sample code we manage the shooting through a click listener, so we added the following command after setting the mViewGroupCamera:refer to "mCameraOnClickListener" definition in the sample code as an example of how to start or end the shooting.mViewGroupCamera.setOnClickListener(mCameraOnClickListener);
depending on the device, our SDK only works in a specific orientation. Therefore we need to set the orientation of the activity accordingly:don't forget at the end to show the relative layout:if(mDMDCapture.isTablet()) { setRequestedOrientation(ActivityInfo.SCREEN_ORIENTATION_LANDSCAPE); } else { setRequestedOrientation(ActivityInfo.SCREEN_ORIENTATION_PORTRAIT); }for viewing the panorama we use a built in image viewer in the sample code.setContentView(mRelativeLayoutRoot);
you can also use our 3D Viewer to view the panorama. -
What you should get
-
By following the previously mentioned easy steps you simply need to present your view controller to start shooting.
Run the app in portrait mode and you will get the following screen:

- Tap on the screen then start rotating your device in the same direction (Left or Right).
- After taking a minimum of 2 shots, you can tap on the screen or rotate your device to landscape mode to finish. DerManDar 3D Viewer will appear showing the captured panorama.
- Tap on the screen then start rotating your device in the same direction (Left or Right).
DMD Panorama Lite App
-
To try the free application "DMD Panorama Lite", (created with this Panorama SDK) you can get it here.
Commercial Panorama SDK
-
For further information about the Commercial version of this Panorama SDK, please click here.